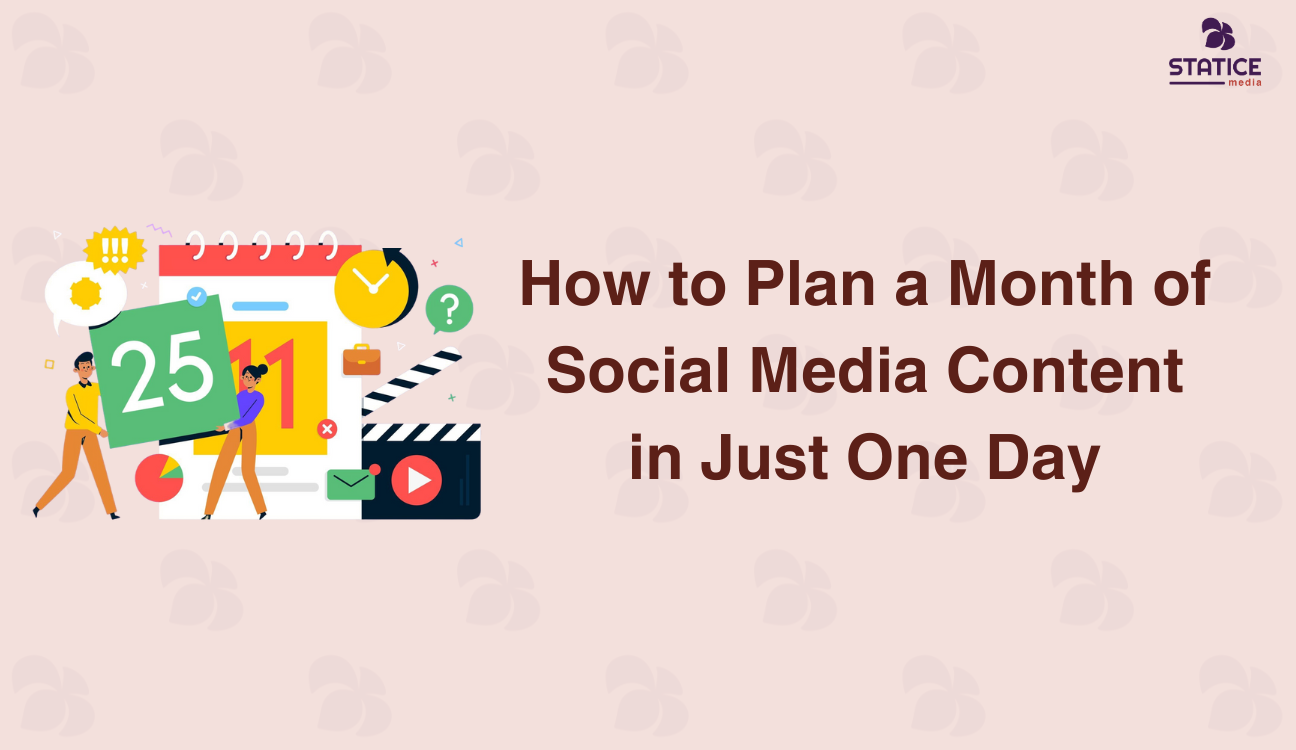
How to Plan a Month of Social Media Content in Just One Day
Small business owners wear many hats, and social media managers are often one of them. If you’ve ever scrambled to throw together a last-minute Instagram post or gone weeks without posting at all, you’re not alone. The good news is that with a bit of upfront planning, you can map out an entire month of content in just one day. This approach saves you time, reduces stress, and keeps your posting consistent (which is crucial for building and retaining your audience). In this friendly guide, we’ll break down a step-by-step process to plan a month’s worth of social media content in one focused day. Let’s get started!
Step 1: Set Aside a Planning Day and Outline Your Goals
Begin by blocking off a single day on your calendar dedicated to content planning. Treat this like an important meeting with yourself – no interruptions, no client calls, just focus time. Pick a day near the end of the month (or whenever you can find a quiet day) and come prepared with anything you might need: a notebook or planning template, your past social posts for reference, and maybe a big cup of coffee.
Before diving into content ideas, outline your goals for the month. Ask yourself what you want your social media to achieve in the coming month: Is it driving more website visits or product sales? Building brand awareness or engagement? Perhaps there’s a seasonal event or a product launch you need to promote. Jot these down. Clear goals will guide your content and ensure each post has a purpose. For example, if one goal is to promote a new product, you’ll plan a few posts highlighting it. If another goal is to boost engagement, you might include some interactive content like polls or questions. Knowing your goals upfront helps you create content that isn’t just consistent, but also strategic.
Don’t forget to note any key dates in the upcoming month. These could be holidays (e.g. Diwali, Valentine’s Day) or relevant observances in your industry (like “Small Business Week” or a popular hashtag day). Marking these on your planner means you can prepare themed posts ahead of time instead of scrambling on the day. With your planning day scheduled, goals defined, and calendar marked with key dates, you’re ready to dive into content brainstorming.
Step 2: Choose Your Content Themes
Now, let’s talk about content themes (also known as content buckets). These are broad categories that your posts will fall into. Defining a few key themes will make brainstorming much easier and ensure you have a good mix of content to keep your audience interested. Aim for 3–5 themes that fit your business and audience. Here are some tried-and-true content buckets for small businesses:
- Educational/Informative: Share tips, how-tos, or interesting facts related to your business or industry. This positions you as a helpful expert. (e.g. a bakery posting baking tips, or a consultant sharing a quick business advice video)
- Behind-the-Scenes: Show the human side of your business. Give a sneak peek of your process, your team, or a “day in the life” at your company. Behind-the-scenes (BTS) content helps humanize your brand and build trust by letting people see the faces and effort behind the product.
- Customer Testimonials/Success Stories: Highlight your happy customers. Share quotes from positive reviews, before-and-after stories, or client success anecdotes. This kind of social proof builds credibility and makes others trust your business (people love to see real experiences).
- Product or Service Spotlights: Showcase what you sell or the services you offer. These posts can feature a product’s benefits, a demo video, or a nice photo with a description of how it solves a problem. The key is to focus on value to the customer, not just “here’s our product”.
Feel free to add other buckets if they make sense for you, such as Inspirational/Motivational content (quotes or success mantras), or Interactive content (quizzes, polls). But the four categories above are a solid foundation for most small businesses. With content buckets defined, you’ll ensure variety in your feed — one day you’re educating, another day you’re entertaining with a behind-the-scenes clip, next you’re building trust with a testimonial. This mix keeps your audience engaged and shows different facets of your brand.
An example of an educational social media post. This simple graphic delivers a quick insight in a visually engaging way. Sharing bite-sized tips or interesting “did you know?” Facts in your field are a great way to inform your audience while demonstrating your expertise.
Now that you have your themes, make a quick list under each one. For instance, under Educational, you might list common questions your customers ask (“How to choose the right running shoes?” if you run a sports store, for example) — each question can become one informative post. Under Behind-the-Scenes, list a few ideas like “meet the team Monday – introduce one employee”, or “show how our products are packaged”, or “a short video tour of our office or store”. For Testimonials, gather a few strong customer quotes or before/after photos you could share. For Product Spotlights, list the specific products, features, or services you want to highlight this month. Don’t worry about being very detailed at this stage; just get all the ideas out. We’ll refine and schedule them next.
Step 3: Brainstorm Content Ideas for Each Theme
It’s time to do a brain dump of content ideas. Take each content bucket from Step 2 and spend some time coming up with post ideas for it. This is a creative phase — no idea is too small or silly to write down! Aim to generate more ideas than you actually need (you can always trim later). Here’s how you can approach each category:
- Educational: Think about questions your customers ask frequently, or tips you wish everyone knew about your product or industry. If you’re a salon owner, for example, ideas could be “5 Tips for Healthy Hair in Summer” or “Quick Tutorial: How to Curl Your Hair with a Flat Iron”. If you’re a consultant, maybe “Common Marketing Mistakes to Avoid” or a glossary term explanation. Even a myth-busting post works here (“Myth vs Fact” in your field).
- Behind-the-Scenes: List out aspects of your daily work that customers might find interesting or relatable. This could be “Packing orders on a busy Monday (timelapse video)”, “Our chef prepping the special of the day (photo)”, “Team brainstorming session vibes (candid shot)”, or “Before we open the store in the morning (photo of you setting up)”. These glimpses make followers feel like insiders and strengthen that personal connection.
- Testimonials/Stories: Identify some happy customers or great feedback you’ve received. Ideas: “Quote from [Customer Name] who loves our service – turn it into a graphic or text post”, “Story of how we helped [Client] solve X problem (short case study in a post)”, or even screenshot a positive social media comment (if appropriate) and thank the customer (this also encourages others to comment!). User-generated content fits here too; for example, repost a customer’s photo of them using your product (with permission).
- Product/Service Spotlights: What offerings do you want to push this month? Perhaps new arrivals, bestsellers, or a service that’s not well-known. Jot those down. For each, think of a unique angle: one post might focus on features/tech specs, another on benefits/solutions it provides, another could be an image of it “in action” or a customer using it. Also consider any special offers to promote. For instance, if you plan a discount or event, include that as a content idea (like “50% off weekend – announce sale”).
At this stage, don’t hold back – get all your ideas listed. You might end up with, say, 5–10 ideas per category. That’s great! You likely won’t use all of them, but it gives you options to choose the best and swap things in if needed. By brainstorming in categories, you ensure a good spread of post types (you won’t accidentally come up with 15 product posts and zero behind-the-scenes). You’ll also start visualizing how these ideas can take shape (maybe you already picture that testimonial as a quote graphic, or that tip as a quick video).
Once you’ve emptied your brain onto paper (or a document), take a short break. Then come back and pick your strongest ideas – enough to fill your content calendar for the month. For example, if you plan to post about 3 times a week, you need roughly 12 posts for the month. If you want 5 posts a week, that’s around 20 posts. Select a balanced mix from your brainstorm list: a few from each category. Pro tip: If you’re new to this, start on the lighter side (e.g. 3 posts/week) so you don’t overwhelm yourself. You can always increase later. Remember, consistency is more important than sheer volume. It’s better to post 3 times every week than 6 times one week and then nothing the next.
Step 4: Create a Simple Content Calendar (Weekly Layout)
Now that you have a bunch of ideas, let’s organize them into a content calendar for the month. This calendar is basically a schedule that shows what you’ll post and when. You don’t need fancy software for this – a simple table drawn on paper, a Google Sheet, or a calendar printout works perfectly. The goal is to map each content idea to a specific date, so you have a clear posting roadmap instead of winging it day by day.
Start by deciding how often each week you’ll post. For a small business handling social media solo, 3–5 posts per week is a healthy, realistic range. (For instance, Monday-Wednesday-Friday, or Monday through Friday if you’re feeling ambitious, with weekends optional.) Mark those posting days on your calendar. It can help to leave at least a day gap between posts if you’re doing 3/week (gives your content more breathing room and you time to engage with any comments).
Next, assign your content ideas to dates. Make sure to mix up the themes throughout the week so you’re not doing two product promos back-to-back, for example. A sample weekly layout might look like this:
- Monday: Educational post – e.g. share a quick tip or how-to relevant to your audience (starts the week by providing value).
- Wednesday: Behind-the-Scenes – e.g. a candid photo or short video of something at your business (mid-week personal touch to humanize your brand).
- Friday: Testimonial or Product Spotlight – e.g. end the week highlighting a happy customer’s review or showcasing a product with a special feature or offer (wrap up the week with credibility or a gentle promotion).
(If you plan 4 posts a week, you could add Saturday for a fun or casual post, like a weekend message or an extra product highlight. If 5 posts, maybe Monday through Friday with each day a different theme.)
Notice how the example above rotates through different content buckets. This ensures your feed doesn’t look one-note. For instance, in a given week you’ve educated your followers, let them get to know your business personally, and shown evidence of your product’s value. Variety keeps people engaged and coming back for more.
As you fill in your calendar, also consider platform mix. Since you’re managing a mix of platforms (Instagram, Facebook, LinkedIn, etc.), decide if you’ll post the same content across all those platforms on the same day or stagger them. A simple approach is to sync them up initially — for example, on Monday you’ll post that tip on Instagram, Facebook, and LinkedIn (perhaps formatted slightly differently for each – more on repurposing in a bit). This keeps things manageable, especially if you’re using a scheduling tool that can post to multiple platforms at once. Alternatively, you might focus different platforms on different types of content (e.g. maybe LinkedIn gets more of the educational and testimonial posts, while Instagram gets more behind-the-scenes and product images). There’s no wrong way, so choose what’s easiest for you to maintain consistency.
Finally, be realistic with your calendar. If certain days are usually too hectic for you to engage (maybe Mondays you’re swamped fulfilling weekend orders), you might avoid scheduling posts on those days and pick a calmer day. And leave a little wiggle room: it’s okay if you don’t have every single day planned – you can leave a slot or two open in case something spontaneous or timely comes up. The aim is to eliminate the daily guesswork. Once this calendar is set, you’ll know exactly what you need to create for each day’s post, which brings us to the next step.
Step 5: Batch-Create Your Content (Write and Design in Batches)
With a calendar of post ideas in hand, you can move on to creating the content itself – this is where you produce the graphics, photos, videos, and captions for all your posts. Doing this in one concentrated day (or two half-days) is a game-changer. The secret is batching: focusing on one type of task at a time, rather than creating each post start-to-finish before moving to the next. Batching makes you more efficient and keeps your quality consistent, because you’re in the zone for that task. Here’s how to batch your content creation:
- Batch 1: Visuals/Media. Gather or create all the visuals you’ll need for your posts. If you need to take photos, plan a mini photoshoot and snap all the necessary pictures in one session (product shots, team photos, etc.). If you’re creating graphics or infographics, use a free tool like Canva to design them. Canva offers tons of templates for Instagram, Facebook, and LinkedIn posts that you can easily customize with your colors and text – no graphic design skills needed. For example, design those quote graphics for testimonials all at once by just swapping out the text and photo, or create a template for your tips so all your educational posts have a consistent look. If video is part of your plan (say a few short clips), batch those too: record them back-to-back when you’re in a filming mindset, then do basic edits in one go (free video editing apps like InShot or Canva’s video editor can be handy). By the end of this visuals batch, you should have a folder of images/videos for each planned post, labeled or ordered by date.
- Batch 2: Writing Captions. Now switch gears to writing. For each post on your calendar, write the caption or accompanying text. Since you already know the angle (thanks to your brainstorm and calendar), this is much easier. Keep the tone friendly and authentic, just like you’d speak to your customers. A few tips for caption writing: Start with a hook (the first line should grab attention – e.g. “Did you know…?”, or “Client win of the week:”), keep the bulk of it concise and clear, and end with a call-to-action (CTA) or question when appropriate. A CTA could be as simple as “Visit our website to learn more” or “Comment below with your favorite…”. Questions boost engagement by prompting responses (e.g. “What behind-the-scenes sneak peek should we share next?”). Also, tailor the caption length and style to the platform: on Instagram you might use a few emojis and hashtags, on LinkedIn you’d keep it more professional in tone and maybe no emojis, on Facebook somewhere in between. The core message can remain the same across platforms, but tweak the wording or format so it feels natural in each place.
- Batch 3: Hashtags & Extras (if applicable). If you use hashtags (likely on Instagram and maybe LinkedIn), prepare a set of relevant hashtags for each post or a general pool of hashtags for your niche that you can copy-paste. This could be part of caption writing or separate. Also, if you need any links (for example, a blog post URL to include on LinkedIn or Facebook), have those ready. Basically, gather all the “extras” that will accompany your posts so you’re not hunting for them later.
As you batch-create, make use of free tools to streamline the process. We mentioned Canva for design – it’s a lifesaver for non-designers and offers free stock images and graphics. For photos, you can also use free stock photo sites like Unsplash or Pexels if you need generic imagery (just be sure it matches your brand style). There are content writing tools and idea generators online too, but it sounds like you’ve got your ideas covered from the brainstorm. Music for videos (if you’re making Reels, for instance) can often be added within the app, but there are free libraries as well. Keep things simple: you don’t need a Hollywood production. Even a smartphone photo with a genuine caption can outperform a slick professional ad if it resonates with your audience.
By the end of your batching session(s), you should have a complete set of ready-to-go social media posts: images/videos and written captions for each date on your calendar. This might feel like a lot of work, but compare it to the alternative of trying to do all these things scattered day by day under time pressure. Most people find batching not only faster in total, but it produces better content because you can give it your full attention. And remember, it’s not about perfection – it’s about getting it done. You can always tweak a caption or swap an image later if needed. The big win here is that you won’t be staring at a blank “New Post” screen every other morning wondering what to say. You’ll already have a lineup of content you’re confident about.
An example of a product spotlight post. This promotional graphic highlights the key features and benefits of a safety workwear product in a visually compelling way. Creating a template for product spotlights (with your branding and a few bullet points like seen here) lets you plug in different products over time while keeping a consistent look and message.
Step 6: Schedule Your Posts and Reap the Benefits of Repurposing
You’ve done the heavy lifting by creating your content – now make sure it actually gets posted! The final step is to schedule your posts in advance. Scheduling is like setting your content on “autopilot”: you pick the date and time for each post, load the content, and it will publish on its own. This means you won’t need to drop what you’re doing every other day to hit “Post”. You can use free scheduling tools or platform features to do this:
- Facebook & Instagram: Use the Meta Business Suite (formerly Facebook Creator Studio) – it’s a free tool from Facebook that lets you schedule posts and Stories to both Facebook and Instagram. You can upload your image/video, paste the caption (including hashtags), and choose the date/time for it to go live. This is super handy and ensures your Instagram and Facebook posts go out even if you’re busy with something else at that moment.
- LinkedIn: LinkedIn has a native post scheduling feature for personal profiles and pages (as of recent updates). When you go to create a post, look for the small clock icon – that’s the scheduler. If you prefer, you can also use a third-party free tool like Buffer or Hootsuite to schedule LinkedIn posts (Buffer’s free plan, for example, lets you connect a few social accounts and schedule a set number of posts per account). Using a scheduler for LinkedIn means you can line up those professional updates without having to remember to log in and post during the workday.
- Others: If you also use Twitter (X) or Pinterest, etc., many of these can be managed in tools like Buffer as well. Twitter has its own scheduler in TweetDeck (free). For the platforms mentioned (IG, FB, LinkedIn), the above solutions have you covered.
Take your content calendar and enter the posts into your chosen scheduling method all at once. It might take an hour or two to get everything scheduled, but once it’s done, you can breathe easy for the rest of the month. Be sure to double-check that each post is scheduled for the correct date and the captions didn’t get cut off (especially watch out for Instagram’s character limit if your captions are long). After scheduling, it’s a good idea to keep a copy of your calendar or list of posts handy so you know what’s coming up each day – that way you can jump in to respond to comments on those posts, since engagement is the next thing you’ll want to handle (but that can be done day-to-day in a few minutes).
While scheduling, let’s talk about repurposing your content across platforms – a huge time-saver and strategy booster. Repurposing means using the same core content idea in multiple ways or on multiple channels. You’ve essentially been doing a form of this by planning to share similar posts on Instagram, Facebook, and LinkedIn. But you can also repurpose format-wise: for example, if you wrote a longer educational post for LinkedIn, you can take the main points and turn them into a quick graphic for Instagram. Or if you created a video for Instagram Reels, share that video on Facebook and LinkedIn as well (perhaps with a different caption geared to each audience). Don’t worry that people will see it twice – in reality, social media algorithms and audience habits mean not everyone catches everything on every platform. Even if they do, repeating a message in a slightly different way only reinforces it.
The benefit of repurposing is huge for a small business with limited time. You already did the hard work of making the content; now squeeze the most value out of it. In fact, a recent survey found that the main benefit of repurposing content is saving valuable time (54% of small business owners said so), followed closely by reaching more people through better brand visibility (52% cited that). So by sharing that awesome customer testimonial on all your platforms (maybe as an image on Instagram, a text post on LinkedIn, and a short video testimonial on Facebook), you’re not only saving time but also amplifying your message to a wider audience.
A few quick tips for repurposing effectively:
- Tailor the delivery while keeping the core idea. For example, the testimonial quote can be a polished graphic on Instagram, but on LinkedIn you might post the quote as text with a short commentary about how you value customer feedback. Same content, adjusted format.
- Use platform strengths: Each social network has its favored format. If you have a longer video (say 2 minutes explaining something), you might post the full version on Facebook or LinkedIn, but cut a 30-second highlight for Instagram. If you wrote a blog article one month, you could later pull snippets from it as individual tips on social media.
- Reposting vs. repackaging: It’s okay to directly repost content from one platform to another (especially between Instagram and Facebook, which is easy to do when scheduling). But when you can, repackage the content for variety – it keeps things interesting. For instance, turn a series of tips that were individual tweets into a single Instagram carousel, or compile a few testimonial quotes into a collage image for a LinkedIn post celebrating your happy clients.
Finally, remember that your scheduled plan isn’t set in stone. If something timely comes up (maybe a sudden trending topic or news relevant to your business), you can adjust your calendar – swap out a post or add an extra one. Scheduling in advance gives you flexibility to be spontaneous because the baseline of consistent content is already covered.
Conclusion: Plan, Post, and Prosper!
By following these steps, you’ve essentially built yourself a social media autopilot for the month. With one dedicated day of planning and creativity, you can free yourself from the daily “what do I post?” stress and instead focus on engaging with your audience and running your business. You’ll be posting with purpose and consistency, which over time really pays off in audience growth and brand trust. Plus, you might find that this process gets faster each month as you learn what content your followers love most and you can reuse great ideas in new ways.
Give yourself a pat on the back once you schedule that last post – you’re ahead of the game! And if a month is easy, you might even try planning two months in advance next time. The key is to find a system that works for you and stick with it.
We hope these tips help make your social media management feel more doable and even fun. If you found this guide useful, be sure to follow Statice Media for more practical social media tips and tricks. And remember, you don’t have to do it all alone – if you ever need a hand with content planning or creation, reach out to us at Statice Media. We’re here to support your small business on its journey to social media success. Happy planning and happy posting!